|
| |
|
Skinning Tutorial Part 1 of 2
Copying and Pasting |
|
|
|
|
- The first thing I will want to do is to rotate it so it is
straight. Ctl + R will bring up the rotate dialogue box (or go
to Image>Rotate)
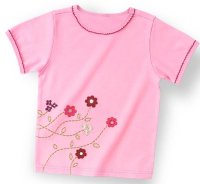
- Next I will crop it in so that the majority of the white background
is cut out, ending up with an image that looks like this:
- To crop the image you will need to select the dotted square tool
that looks like this:
 In your tools options make sure that rectangle is selected as the
shape and antialiasing is turned off and the feather is set to
0. Click in a corner of the image and drag the mouse to the
opposite corner. Once you have the portion of the image you want
in the selection either hit Shft + R or go to Image>Crop to
selection. You may have to practice a little to get it just
right. If the selection is the correct size but not quite in
position you can use the layer tool:
In your tools options make sure that rectangle is selected as the
shape and antialiasing is turned off and the feather is set to
0. Click in a corner of the image and drag the mouse to the
opposite corner. Once you have the portion of the image you want
in the selection either hit Shft + R or go to Image>Crop to
selection. You may have to practice a little to get it just
right. If the selection is the correct size but not quite in
position you can use the layer tool:  to move the selection by right clicking in the selection and moving
it. You can also add to or subtract from the selection by using
the selection tool while holding down Shft (to add) or Ctl (to
subtract).
to move the selection by right clicking in the selection and moving
it. You can also add to or subtract from the selection by using
the selection tool while holding down Shft (to add) or Ctl (to
subtract).
- Now you're ready to place the shirt on your base skin. With
the image activated hit Ctl + C to copy the image (or
Edit>Copy). Then activate your base skin and hit Ctl + L to
paste the layer (or Edit>Paste>As new layer). It will
always be pasted smack dab in the middle of the image.
- Use the layer tool again to position the shirt on your base skin,
this time left-clicking
- It's okay if the image is too large for your skin. That's what
the deformation tool is for. He's your friend. Click on
him. Now your shirt layer will be surrounded by a square with
dots in strategic places. Click on these dots and drag them to
adjust your shirt to the correct size. You may need to play
around with it for a little bit first. When you're finished it
will look something like this:
 To get the deformation to apply so you can continue simply double
click on the image. You will get a dialogue box asking if you
want to apply the deformation. The answer is OK.
To get the deformation to apply so you can continue simply double
click on the image. You will get a dialogue box asking if you
want to apply the deformation. The answer is OK.
- Now for the white part. You definitely don't want that in your
final image so it's time to meet Mr. Eraser tool:
 He's a very good friend, too. My settings for this tool are
usually about 50-100% opacity (the higher the opacity, the more
thoroughly it erases, the lower the opacity, the more forgiving of
errors it is), 25-75% hardness (the higher the hardness, the more
solid your eraser edge is going to be). Just experiment with it
and find what you like. Remember Ctl + Z is undo if you make an
error, just tap those keys and you can try it again. You can
undo more than one step, too. Here's what it will look like when
you're through:
He's a very good friend, too. My settings for this tool are
usually about 50-100% opacity (the higher the opacity, the more
thoroughly it erases, the lower the opacity, the more forgiving of
errors it is), 25-75% hardness (the higher the hardness, the more
solid your eraser edge is going to be). Just experiment with it
and find what you like. Remember Ctl + Z is undo if you make an
error, just tap those keys and you can try it again. You can
undo more than one step, too. Here's what it will look like when
you're through: 
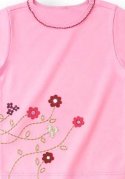
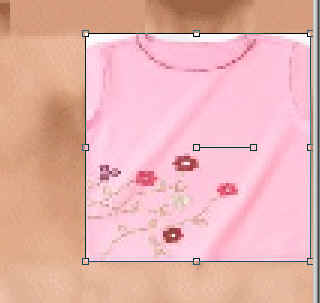
- To do the back I select a portion of the shirt with my select
tool. I try to get the most even looking portion because I'll be
tiling it to fill the back of the shirt. The picture above shows
the selection I made. When you've selected the portion you will
use hit Ctl + C to copy (or Edit>Copy) and Ctl + V to paste it (or
Edit>Paste>As new image).
 is what I got. It's not much but that's okay.
- Now select the back of your nude base. Go to the fill tool and
select on the Tool Options box "Pattern", then click on the
tab that has a grid on it and scroll down to your piece of
"cloth". This is now going to fill whatever you click
on with your "cloth" pattern by tiling it. Click in
the selection you made on the back of your base. Voila!
You should now have the back of the shirt. Use the retouch tool
(I set mine at about 15-25 opacity, 75 hardness, 13 step on the first
tab, on the second tab I have "smudge" selected--make sure
you have "build up brush" checked or it won't do a thing) to
smooth out any strange looking areas
- You'll need to do the same with the arms. The shoulders and
underarms are in the center of the arms.
Cool. Now you have your shirt. You can test it out in your
preview program now if you'd like or you can go on to the next stage . . .
starting from scratch--the shorts.
|

|